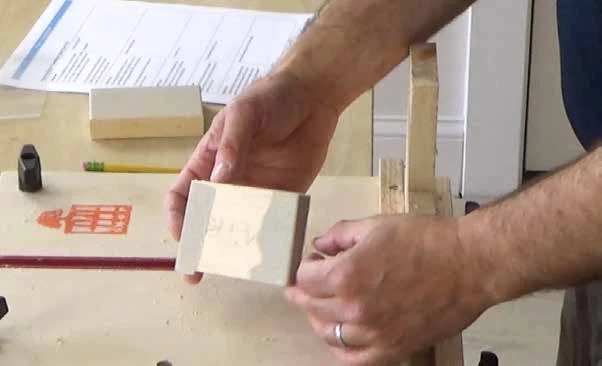
What you will make
A flat wooden block supports the abrasive paper while you sand. Practice measuring a finished length, marking a square line, making a crosscut across the grain, and fitting the paper smoothly. Maplewoodshop estimates about 20 minutes; allow extra time for the demonstration and checks.
Materials and layout
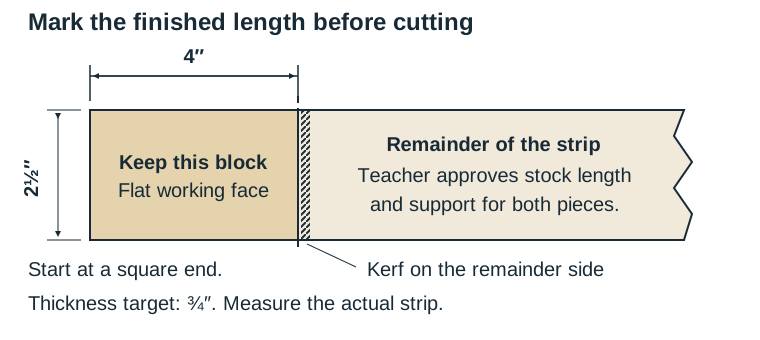
- A teacher-prepared, square-ended pine strip. Target block: 2½″ wide × 4″ long × ¾″ thick. Measure the actual strip.
- Measuring tape or ruler, combination square, pencil, and teacher-approved pull saw.
- Teacher-provided vise or hold-down arrangement and safety goggles.
- Adhesive-backed abrasive that fits the working face, separate abrasive for smoothing the wood, and teacher-provided scissors for trimming the paper.
- A teacher-provided scrap for a short sanding test.
Prepare the station
- Wear safety goggles and use the saw only after the class demonstration.
- Have the teacher approve the actual saw, cut side, and support for the strip and the small block as it separates.
- Keep hands clear of the blade path. Stop if the strip moves or the small piece cannot stay supported.
Build the block
Inspect and measure.
Check for cracks, splinters, and a damaged reference end. Measure the strip's width and thickness. Confirm that the end you will measure from is square and the material matches the approved plan.
Mark the finished length.
Measure 4″ from the square reference end. Use the combination square to draw a line across the strip. Mark the short section “keep” and identify the remainder side where the saw kerf will go.
Check the holding setup.
Secure the strip as demonstrated. Keep the cut clear of the bench and supports. Show the teacher your line, the blade's intended side, and how both pieces will be supported before you start.
Make the crosscut.
Use the demonstrated pull-saw technique. Keep the kerf on the remainder side of the line so the intended block retains its finished length. Stop and reset with the teacher if the wood shifts. Keep your hands out of the blade path as the cut finishes.
Smooth and fit.
Remove splinters and rough cut marks with the supplied abrasive. Lightly ease sharp edges while keeping the working face flat. With the backing still on, fit and trim the adhesive-backed paper to cover that face. End wrapping needs extra paper measured for the actual block.
Attach the abrasive.
Remove loose dust using the class cleanup method. Follow the abrasive product's directions: remove the backing, align the paper with the working face, and press it down smoothly. Check that it has no loose corners, folds, or bubbles.
Try the tool and label it.
Secure the test scrap as directed. Use a few light, controlled sanding strokes with your fingers on the uncovered block surfaces. Stop if the paper shifts. Label an uncovered side with your name and the abrasive's actual grit label, if supplied.
Check and clean up
- The block is comfortable to grip and has no loose splinters or sharp corners.
- The working face is flat and the abrasive stays smooth and attached during the test.
- Measure the finished length and explain any difference from the target.
- Return tools, save usable offcuts, and clear dust and scraps using the class routine.
Reflect and extend
How did the square reference end and waste-side kerf help you control the finished length? What would make your grip more comfortable?
Optional: sketch another shape for an awkward sanding space and get approval before changing the cutting plan. Keep your finished block for later projects.
Adapted for STEM Guides from Maplewoodshop project materials with permission. Photograph © 2016-2021 Maplewoodshop. The prepared-strip sequence and original layout diagram are STEM Guides teaching adaptations. Maplewoodshop.