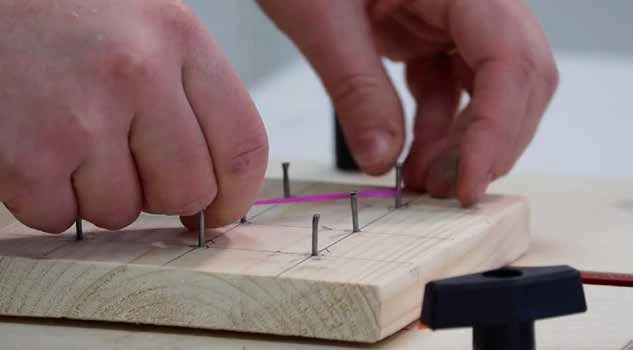
What you will make
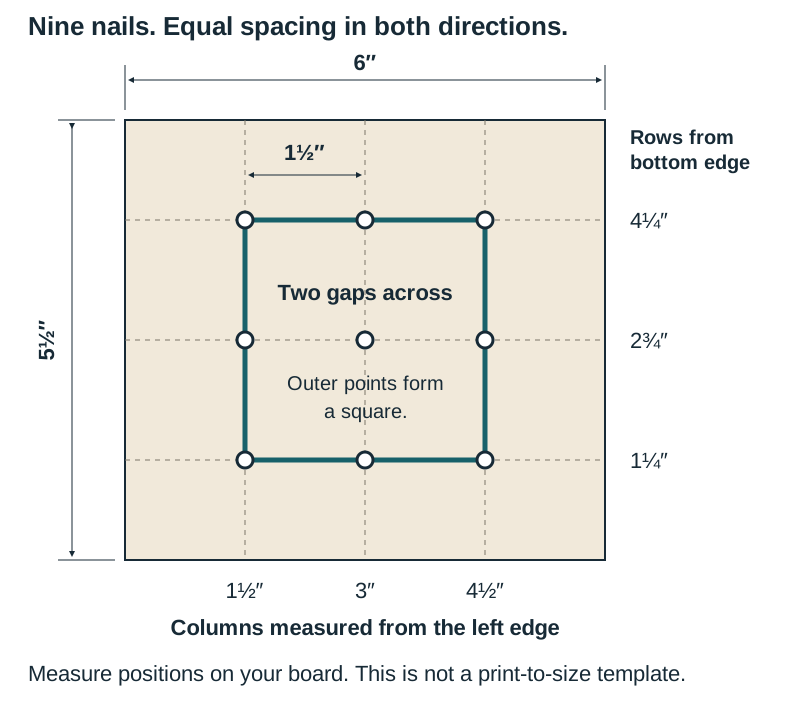
This version uses three rows and three columns: 9 nails in total. Adjacent points are 1½″ apart in both directions. Practice measuring from a reference edge, making square layout lines, and hammering to a tested height. Allow about 30 minutes plus the demonstration and checks.
Materials and grid
- One teacher-prepared pine blank: 6″ horizontally × 5½″ vertically. Planning thickness is ¾″; measure your actual blank before hammering.
- Nine teacher-approved 1¼″ finishing nails, with spares available, plus an instructor-tested depth guide.
- Safety goggles, pencil, ruler or measuring tape, combination square, hammer, and the teacher-approved nail-starting aid or method.
- A sanding block or supplied abrasive, a secure bench holding setup, and suitable bands approved for the class.
| Reference | Positions |
|---|---|
| Columns from left edge | 1½″, 3″, 4½″ |
| Rows from bottom edge | 1¼″, 2¾″, 4¼″ |
Prepare the station
- Wear goggles while hammering and using bands. Check the hammer and bench setup with the teacher.
- Keep hands out of the striking path and give other people room. Use the demonstrated nail-starting method.
- Keep band tension modest and your face away from stretched bands. Stop if a nail loosens, a tip appears underneath, or a band is damaged.
Build the board
Measure and orient the blank.
Confirm the 6″ side runs left to right and the 5½″ side runs bottom to top. Measure the thickness and inspect for cracks. Identify the left and bottom reference edges with light pencil labels.
Smooth the wood.
Use the supplied abrasive to remove rough areas and splinters. Keep the face flat and the reference edges recognizable. Remove loose dust using the class cleanup method.
Draw the three columns.
From the same left edge, measure the three column positions in the table. Use the combination square to draw light lines parallel to that edge. Each adjacent pair of lines should be 1½″ apart.
Mark the three rows.
Measure all three row positions from the same bottom edge. Draw light crossing lines using the square. Circle the nine intersections. Check spacing in both directions and count all nine positions before picking up a hammer.
Check the layout and depth guide.
Show the teacher the dimensions, reference edges, nine marks, and actual nails. Secure the board as demonstrated. Learn how the tested depth guide indicates the approved stopping height.
Hammer the nine nails.
Start the first nail with the demonstrated method and hammer squarely toward the approved stopping height. Have the teacher inspect that first nail, including the underside, before continuing. Repeat at the remaining marks. Stop for help with leaning or bent nails, cracks, or any tip showing underneath.
Try a shape.
After the teacher checks that the nails are secure, add one suitable band with modest tension. Connect several points to make a shape. Keep your face back and avoid pulling on the nails. Remove damaged bands and report any loose nail before further use.
Check and clean up
- There are nine secure, upright nails at the approved height, with tips contained underneath.
- The intended spacing is equal in both directions and the wood has no loose splinters or new cracks.
- Bands form shapes without excessive tension. Remove them when finished and store the board so the exposed nail heads cannot catch or strike someone.
- Collect spare nails and bands, return tools, and clean the station.
Use the grid
Three pins across create 2 intervals. In the planned layout, the four outer corner points form a square with side length 2 × 1½″ = 3″. Its perimeter is 12″ and its area is 9 square inches. The grid contains 4 small square cells, even though it has nine nails.
Make a different shape. Sketch it, label its dimensions, and explain your perimeter or area calculation. You can also plan a shape in the Geometry workspace.
Adapted for STEM Guides from Maplewoodshop project materials with permission. Photograph © 2016-2023 Maplewoodshop. The selected blank size, exact offsets, math examples, and original diagram form the STEM Guides class layout. Maplewoodshop.