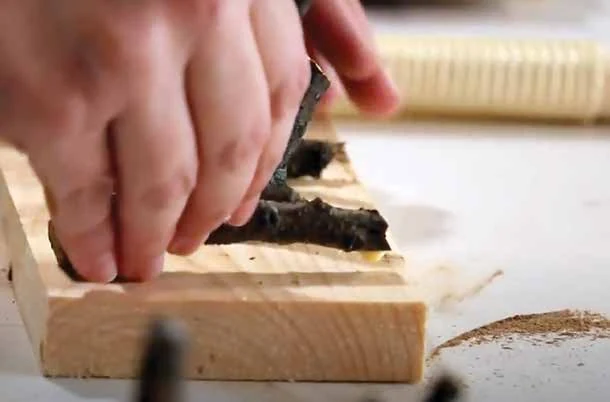
What you will make
Make an 8″ base with 3 prepared twig hooks. Practice a straight crosscut, surface preparation, dry-fitting, and glue assembly. The source estimate is about 30 minutes of activity. Full glue cure and instructor mounting happen afterward.
Materials and preparation
- One teacher-approved nominal 1-by-4 pine board with a 12″ starting length and a square reference end. Planning thickness is ¾″; measure the actual width and thickness. The finished base length is 8″.
- Three teacher-selected, dry, sturdy twig hooks, already trimmed to fit this project. Each needs a stable back suitable for the approved glue.
- Measuring tape or ruler, combination square, pencil, pull saw, teacher-provided hold-down or vise setup, and safety goggles.
- A sanding block or supplied abrasive.
- The actual wood glue approved for the prepared surfaces, its product directions, and the application, surface-protection, or clamping supplies it requires.
Prepare the station
- Wear goggles and use the saw only after the class demonstration. Have both the base and remainder supported as the cut finishes.
- Keep fingers out of the blade path. Stop if the board moves or the remaining piece cannot be secured.
- Follow the actual glue label and instructor's handling and cleanup directions. Leave the assembly in its approved curing location.
Build the rack
Inspect the base and hooks.
Check the board for cracks and splinters. Ask the teacher to replace brittle or loose twig pieces. Identify the back of each prepared hook and check that it can contact the board without rocking.
Mark the base length.
Measure 8″ from the square reference end. Draw a square crosscut line. Label the base “keep” and identify the remainder side of the line for the saw kerf, the material the blade removes.
Cut and smooth the base.
Secure the board and get the teacher's approval for the cut side and both-piece support. Crosscut using the demonstrated technique, keeping the kerf on the remainder side. Smooth the cut face and remove splinters with the supplied abrasive.
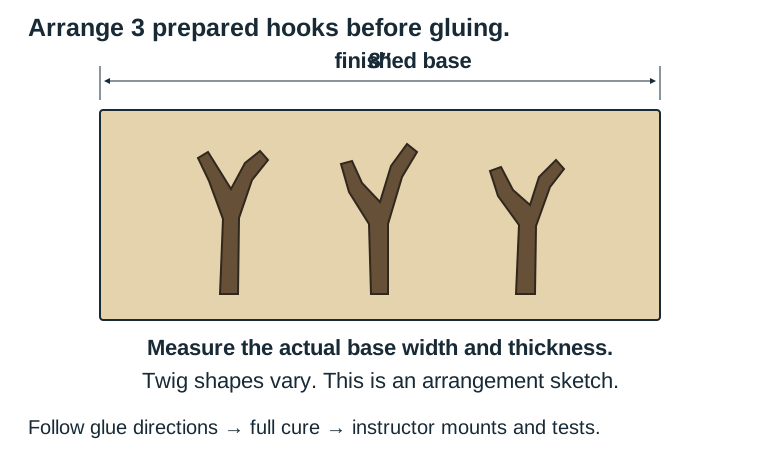
Arrange all three hooks without glue.
This is a dry-fit. Choose which long edge will be up when the rack is mounted. Arrange the hooks so their branches can hold key rings with useful room between them. Mark each position lightly and match each hook to its mark.
Prepare the glue-contact surfaces.
Use the sanding block as directed to make the prepared backs fit the board securely. Check again for rocking, then remove loose dust using the class routine. Have the teacher check the surfaces and the intended upright arrangement before gluing.
Glue in the approved positions.
Follow the actual glue directions for surface preparation and application. Put each hook at its matching mark. Ask the teacher to help with the approved holding or clamping method, and clean squeeze-out as the product directions allow.
Wait for full cure.
Leave the assembly undisturbed in the approved position. Use the product's full-cure directions and the teacher's instructions to determine the earliest test time. A joint that feels dry is not automatically ready to use.
Hand off for mounting and testing.
After full cure, bring the rack to the teacher for joint inspection, approved mounting, and a test for the intended light keys. Wait for that check before hanging anything. No numerical carrying capacity is established by this project.
Check before use
- The base and hooks have no loose splinters, fragile tips, or rocking contact surfaces.
- All three hooks stay in the intended positions after the full cure and teacher's inspection.
- The instructor has mounted and tested the rack for its intended light-key use. Report a moving hook or loose mounting before using it again.
- Return tools, save useful offcuts, and clean the station according to the glue and class directions.
Reflect and extend
Which natural shape made the best hook? Explain how the contact surface, spacing, and cure time affected your design.
Optional: sketch a revised arrangement or decorate areas away from the glue-contact surfaces using a teacher-approved finish. More decoration does not establish a stronger joint or higher carrying capacity.
Adapted for STEM Guides from Maplewoodshop project materials with permission. Photograph © 2016-2022 Maplewoodshop. Prepared hooks, the three-hook arrangement sketch, and the cure/mounting handoff are STEM Guides teaching adaptations. Maplewoodshop.