Know the tool
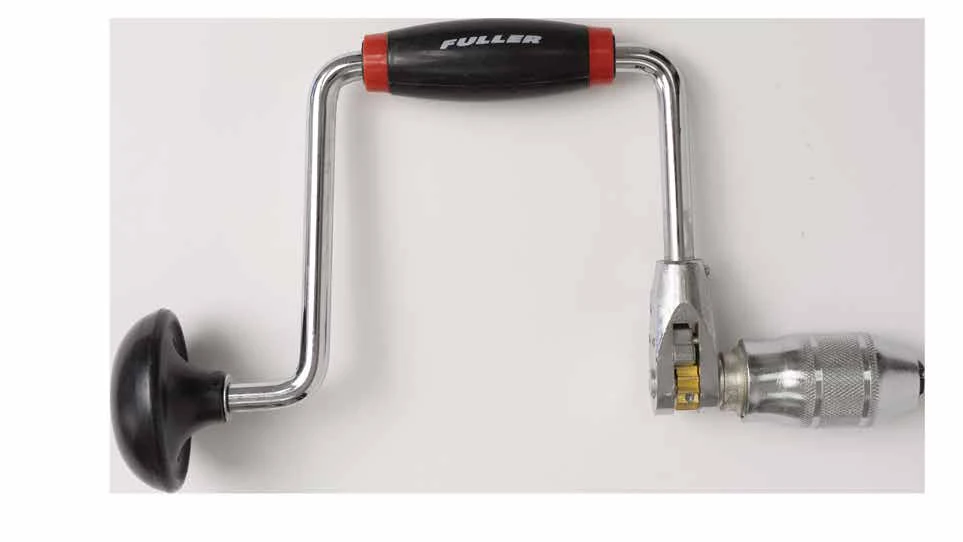
Your goal: Make a supervised practice hole to the instructor's selected position and depth.
A brace has a head, offset crank, grip, and chuck that holds the bit. The crank turns the bit without a motor. Bit type and support affect how it cuts and how it must be withdrawn.
Identify the head/support hand position, turning grip, chuck, bit, and full turning clearance.
Watch and prepare
At your station
- An inspected brace with an instructor-installed bit and selected depth guide.
- A marked scrap secured with approved backing/support, eye protection, and room for the crank to turn.
Demonstration and setup
- Have the instructor choose the bit, test its secure fit, and demonstrate support, alignment, controlled turning, and withdrawal.
- Confirm the bit's path and stopping depth. Keep hands and supports out of its intended exit path.
- Use the pressure and stance demonstrated for the actual bit and material. Stop if the bit stalls or the setup moves.
Practice
Start after the demonstration and the instructor's setup check. Stop and ask for help if the work moves or the tool does not behave as demonstrated.
Approve the setup.
Identify the center mark, selected depth, backing, and workholding. Show the clear crank and bit paths to the instructor.
Align the bit.
Place the bit at the mark using the demonstrated grip and support. Check the intended angle before turning.
Turn steadily.
Rotate the crank slowly with control, maintaining the approved alignment. Stop at the depth guide or sooner if the work shifts or the bit binds.
Withdraw and inspect.
Use the bit-specific withdrawal method demonstrated by the instructor. Set the tool down safely and compare the hole position and depth with the target.
Show your skill
Show the instructor these observable results before using the skill in a project:
- The bit is secure, the work stays fixed, and the crank has full clearance.
- The tool remains aligned during controlled turning.
- The hole is checked against the intended position and selected depth.
Check your understanding
What should you do if the bit stops turning easily?
Reveal the explanation
Stop and ask the instructor to check the bit, chips, alignment, and support. Do not force the crank or lever the bit sideways.
Answer aloud or on paper, then compare with the explanation.
Use the skill
Use the skill again at the next instructor-approved practice station.
Maplewoodshop materials adapted with permission. Images © Maplewoodshop. Practice tasks and learning checks by STEM Guides. Maplewoodshop.