Know the tool
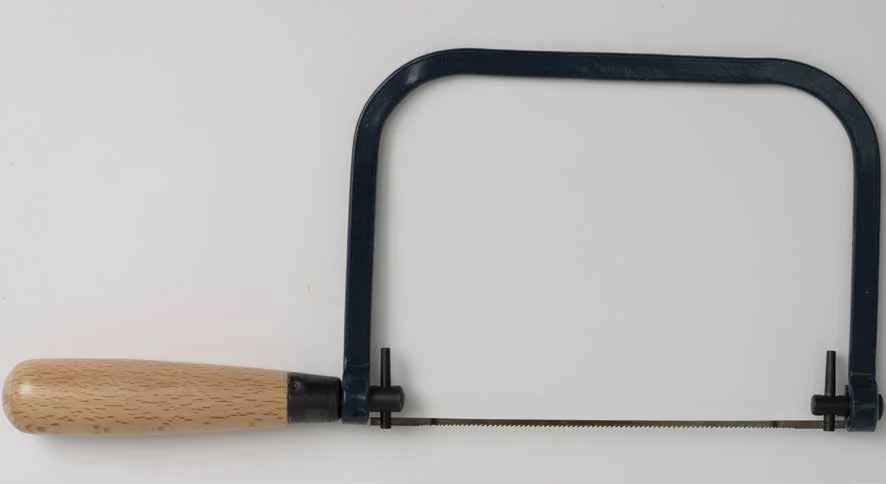
Your goal: Make a supervised curved cut on a secured practice sample.
A coping saw has a frame, handle, and narrow replaceable blade. The blade's installation determines its cutting direction; check the actual saw with the instructor.
Identify the frame, blade, handle, and blade mounts. Notice the space the frame needs as the cut turns.
Watch and prepare
At your station
- An instructor-inspected coping saw with the blade installed and tensioned.
- A secured wood sample with a broad curve beginning at an edge, approved support, and eye protection.
Demonstration and setup
- Watch the instructor demonstrate hand positions, cutting direction, frame clearance, and steering on this actual setup.
- Let the narrow blade cut with light strokes. Never force it sideways to make a tight turn.
- Leave blade changes and tension adjustments to the instructor for this introductory practice.
Practice
Start after the demonstration and the instructor's setup check. Stop and ask for help if the work moves or the tool does not behave as demonstrated.
Plan the curve.
Identify the entry edge, line, waste side, and route for the frame. Have the instructor approve the support and cut before starting.
Start gently.
Use the demonstrated grip and light strokes in the blade's cutting direction. Keep the sample secured and hands outside the blade path.
Steer gradually.
Follow the broad curve with small direction changes as demonstrated. Stop before any support or workholding needs repositioning; ask for help if the blade binds.
Finish and inspect.
Finish with the waste supported, set the saw down, and compare the curve with the line. Report any loose, bent, or broken blade immediately.
Show your skill
Show the instructor these observable results before using the skill in a project:
- The blade and frame stay clear of clamps, supports, and hands.
- The curve is made with controlled strokes and gradual steering.
- You stop for binding or setup changes rather than twisting the blade.
Check your understanding
What should you change when a turn feels too tight for the blade?
Reveal the explanation
Stop and ask the instructor to review the route, support, and turning technique. Do not force the blade sideways; a revised path or additional preparation may be needed.
Answer aloud or on paper, then compare with the explanation.
Use the skill
Use the skill again at the next instructor-approved practice station.
Maplewoodshop materials adapted with permission. Images © Maplewoodshop. Practice tasks and learning checks by STEM Guides. Maplewoodshop.